Rehabilitation after reverse total shoulder arthroplasty: a phase-by-phase guide
Rehabilitation after reverse total shoulder arthroplasty must balance wound care, implant protection, recovery of motion, and progressive deltoid and periscapular training. This illustrated guide explains common exercises and safety precautions from the first postoperative week through week 12 and beyond.
Key points
- The surgeon and rehabilitation clinician should determine progression based on the procedure, any soft-tissue repair, clinical findings, and follow-up assessment.
- Early priorities are protecting the implant, controlling pain and swelling, and maintaining elbow, wrist, and hand motion; shoulder exercises are advanced in stages.
- During early recovery, avoid reaching behind the back, shoulder hyperextension, weight-bearing through the operated arm, and lifting without clearance.
- Stop exercising and contact the care team if pain or swelling continues to worsen, the wound changes, or the arm suddenly becomes weak.
For sports medicine conditions, diagnosis-related questions, or academic exchange, please contact Dr. Jiwu Chen.
Contact usWhy is rehabilitation different after reverse shoulder arthroplasty?
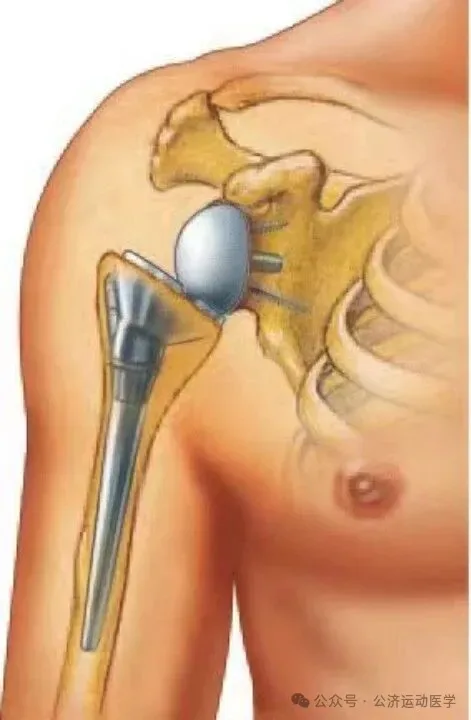
Reverse total shoulder arthroplasty switches the positions of the shoulder’s ball and socket, allowing the deltoid to contribute more to arm elevation. It is commonly used for conditions such as a massive irreparable rotator cuff tear with joint disease, a complex fracture, or a failed previous shoulder replacement.
Postoperative rehabilitation must protect implant stability, healing soft tissues, and deltoid function. The surgical approach, any subscapularis or other soft-tissue repair, bone quality, and risk of complications vary between patients, so the time points below are general guides.
Four safety principles before you begin
Follow the plan prescribed by your surgeon or rehabilitation clinician. If your individual instructions differ from this guide, follow your clinical plan.
During early recovery, avoid reaching behind your back, shoulder hyperextension, and the combined position of adduction, internal rotation, and extension.
Until your surgeon gives clearance, do not use the operated arm to push up from a bed or chair, support body weight, or lift objects.
Keep every movement slow and controlled. A mild stretch may be acceptable, but stop immediately if you develop sharp pain, marked compensation, or steadily worsening symptoms.
Early recovery: wound care, icing, and sling use
Wound care and dressing changes
Keeping the incision clean and dry helps reduce infection risk. Avoid getting the incision directly wet during early recovery. Showering and suture removal should be guided by wound healing and your surgeon’s instructions.
- Dressings are commonly changed every 2 to 3 days, and sutures may be removed at about 2 weeks; timing may vary with the closure method.
- Seek medical care promptly for marked redness, persistent drainage, an unpleasant odor, or fever.
Local icing
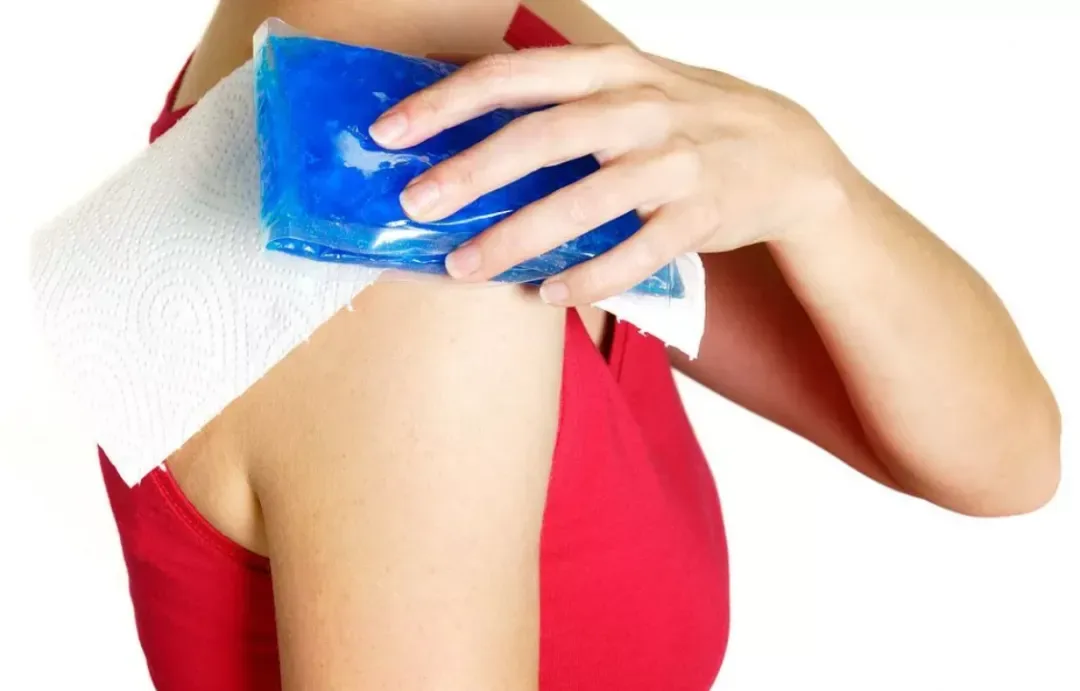
Icing can help reduce postoperative pain and swelling. Wrap the ice pack in a clean, dry towel and do not place it directly on the skin.
- Limit each session to 15 minutes, with at least 2 hours between sessions.
- If the shoulder becomes painful or swollen after exercise, use ice as directed.
- Ask your clinician before icing if you have reduced skin sensation, poor circulation, or difficulty sensing temperature.
Shoulder sling
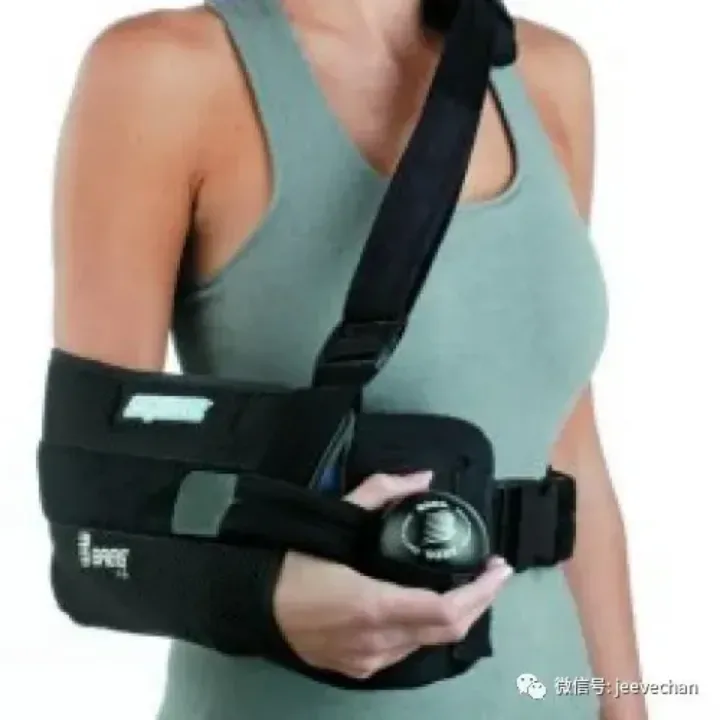
A sling is commonly worn during daily activities and sleep for the first 4 weeks and is usually kept on when outdoors. The forearm should rest beside the body with the abduction pillow supporting it. Your surgeon will determine the exact duration.
- Do not shorten sling use or change its angle without guidance.
- If sleep is difficult, ask whether pillows may be used to support the operated arm in a different position.
Rehabilitation timeline at a glance
Recovery can be divided into weeks 0–3, weeks 4–6, weeks 7–12, and after week 12. Progression also depends on pain and swelling, wound status, range of motion, muscle control, and follow-up findings.
| Rehabilitation item | Weeks 0–3 | Weeks 4–6 | Weeks 7–12 | Week 12+ |
|---|---|---|---|---|
| Icing | Repeated icing | Ice after exercise | Ice after exercise | Ice after exercise |
| Sling | Wear the sling | Intermittent use during the day Wear during sleep | May discontinue | None |
| Range of motion | (Passive) Flexion <90° Abduction <90° External rotation <15° | (Passive) Flexion <120° Abduction <120° External rotation <30° | (Active) Flexion <140° Abduction <140° External rotation <30° | Progress gradually toward full range Avoid flexion or abduction >150° Extension >50° Internal rotation >50° |
| Reach behind the back | ❌ | ❌ | ❌ | ✅ |
| Weight-bearing through the operated arm | ❌ | ❌ | ❌ | ✅ |
| Driving | ❌ | ❌ | ❌ | ✅ |
| Lifting limit | ❌ | No heavier than a cup | Up to 2 kg | Up to 4 kg |
| Seated table slides Seated elbow flexion/extension Pendulum exercises Wrist and finger mobility | ✅ | ✅ | ✅ | ✅ |
| Assisted flexion Assisted external rotation Isometric contractions Shoulder-girdle relaxation | ❌ | ✅ | ✅ | ✅ |
| Standing wall climbs Seated stretching Active elbow flexion/extension Side-lying external rotation Supine stretching | ❌ | ❌ | ✅ | ✅ |
| Resistance-band exercises Wall ball rolls Supine circles Supine shoulder punch Low row | ❌ | ❌ | ❌ | ✅ |
From week 1: relax the shoulder and move the elbow, wrist, and fingers
The priorities in this phase are protecting the surgical site, controlling symptoms, and maintaining motion in the joints farther down the arm. Shoulder movement should be gentle, without actively lifting the arm.
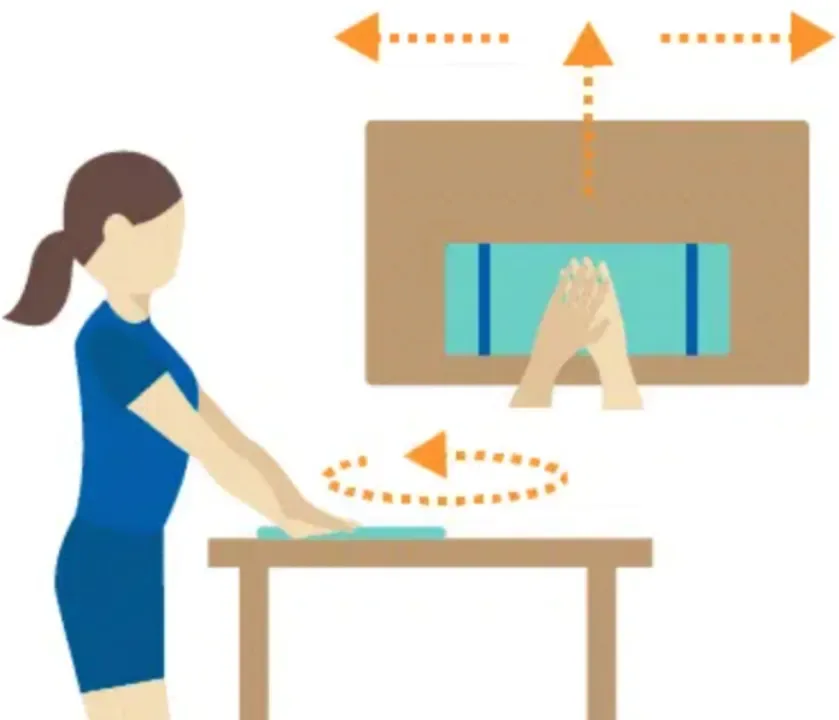
Seated table slides
Sit at a table and place the operated hand on the surface. Use the table for support while sliding the hand slowly forward and back. Keep the movement smooth and do not increase the range suddenly.
- 2 to 3 sets per day, 10 to 20 repetitions per set.
Seated elbow flexion and extension
Sit securely with the operated arm resting on your thigh. Slowly bend and straighten the elbow without swinging or using excessive force.
- 2 to 3 sets per day, 10 to 20 repetitions per set.
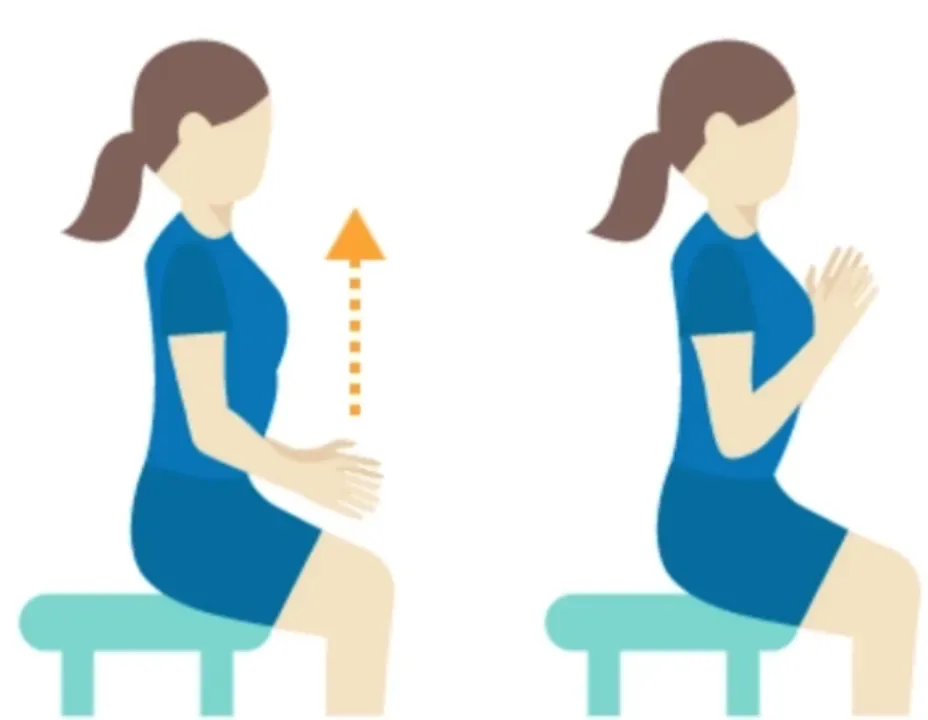
Pendulum exercises



Lean forward and support yourself with the unaffected hand on a table or wall. Let the operated arm hang naturally. Use a gentle body sway to create small circular, forward-and-back, or side-to-side movements without actively swinging the shoulder.
- 2 to 3 sets per day, 10 to 15 repetitions per set.
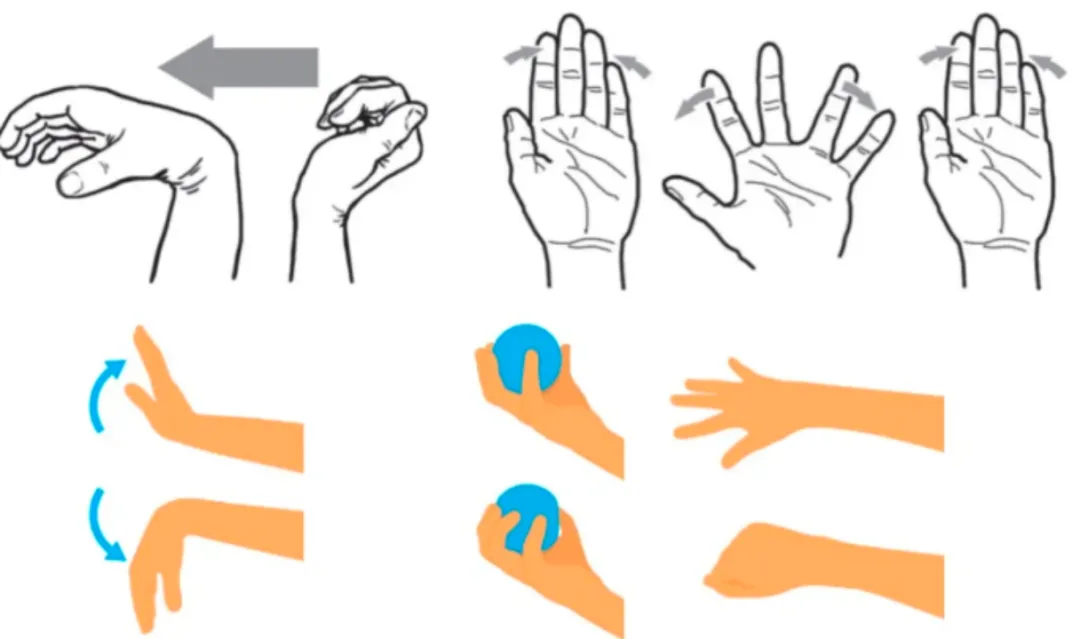
Wrist and finger mobility
With the shoulder relaxed, rotate and bend the wrist, bring the fingers together, make a fist, and touch the thumb to each fingertip. These movements help maintain mobility and reduce hand swelling.
- Practice for 3 to 5 minutes each hour.
From week 4: assisted motion and scapular stabilization
After clinical clearance, assisted shoulder motion and gentle activation of the periscapular muscles and deltoid can be introduced gradually. Stay within the permitted range.

Supine cane-assisted shoulder flexion
Lie on your back and hold a rigid cane or stick about 80 to 100 cm long with both hands. Use the unaffected arm to guide the operated arm slowly into flexion.
- 2 to 3 sets per day, 10 to 15 repetitions per set.

Supine cane-assisted external rotation
Lie on your back with the operated elbow bent to about 90 degrees and held close to the trunk. Hold the cane with both hands and use the unaffected hand to push the operated forearm outward slowly. Pause at the permitted limit, then return with control.
- 2 to 3 sets per day, 10 to 15 repetitions per set.
- Observe the external-rotation limit prescribed by your surgeon.
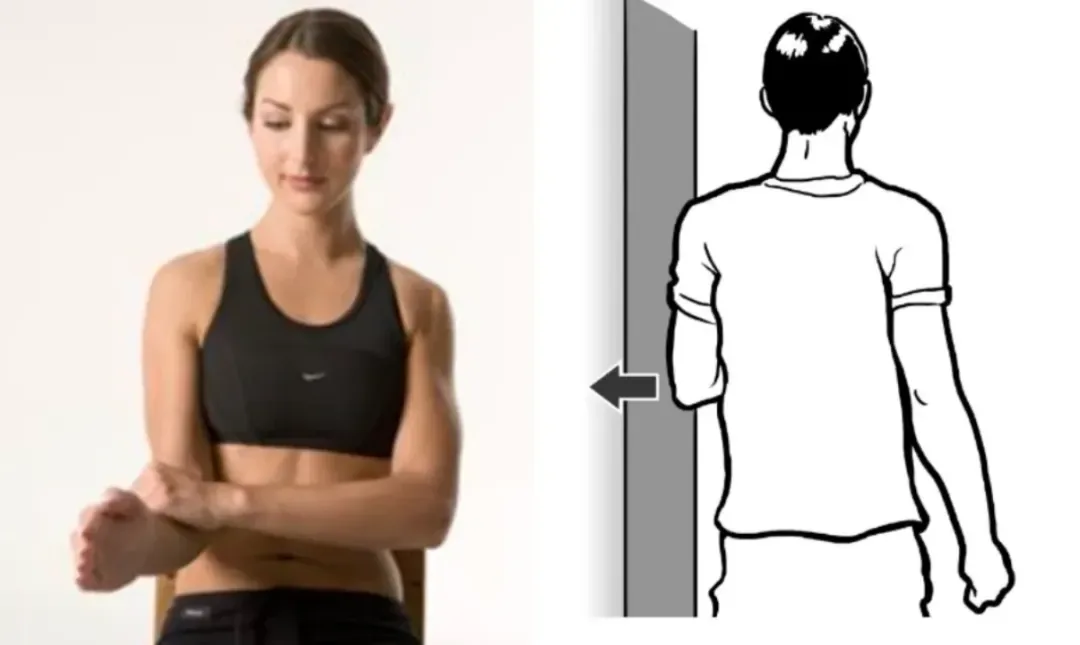
Shoulder isometrics
Bend the elbow to about 90 degrees. Press the unaffected hand against the outside of the operated forearm and apply gentle opposing pressure without allowing the arm to move. A door frame may also be used under clinician supervision.
- Hold for 5 to 10 seconds, 10 repetitions per set, 3 sets per day.


Scapular retraction and shoulder shrugs
For scapular retraction, gently draw the shoulder blades toward one another while keeping the chest upright. For shrugs, move the operated arm slightly away from the body and slowly raise the shoulder toward the ear. Avoid breath-holding and excessive substitution.
- Hold for about 5 seconds, 10 repetitions per set, 3 sets per day.
From week 7: gradually restore shoulder range of motion
Active motion can be increased gradually after follow-up clearance. The aim is to recover the functional range needed for daily activities while maintaining coordinated scapulohumeral movement.


Forward and side wall climbs
Face the wall for flexion and stand with the operated side toward the wall for abduction. Walk the fingers slowly upward until you feel a mild stretch, pause, then return to the starting position with control.
- Hold for about 5 seconds, 10 repetitions per set, 3 sets per day.

Side-lying external rotation
Lie on the unaffected side with the operated elbow bent and the forearm resting in front of the body. Keep the upper arm stable and rotate the forearm outward slowly. Hold briefly, then return with control.
- Hold for about 5 seconds, 10 repetitions per set, 3 sets per day.
- Strictly observe any external-rotation restriction prescribed by your surgeon.
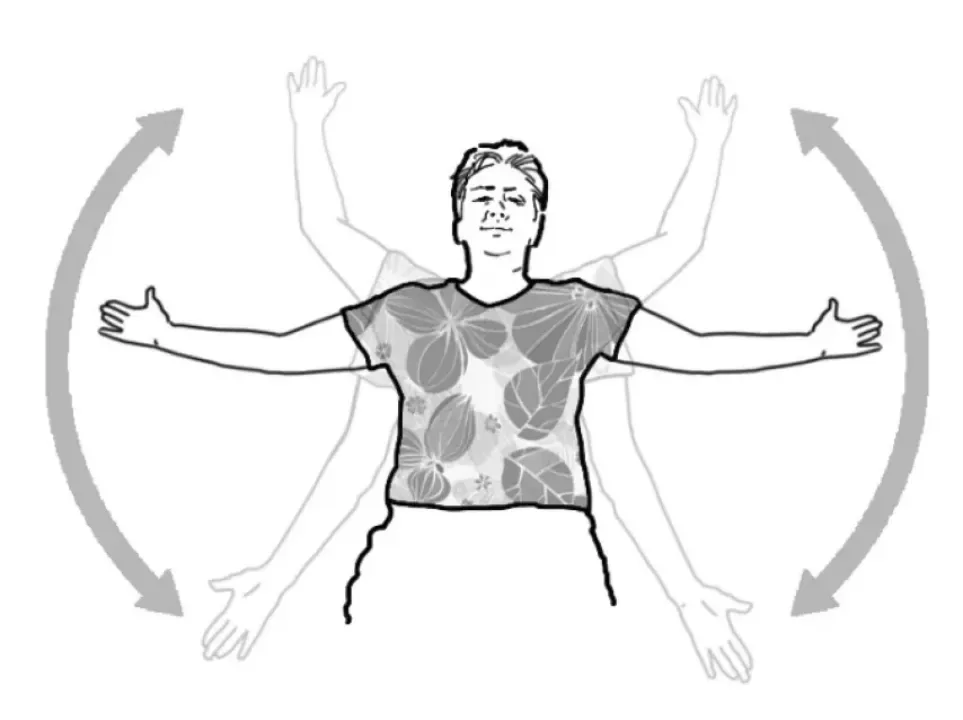
Supine shoulder abduction
Lie on your back with the operated arm beside the body and the elbow slightly bent. Move the arm slowly out to the side within the permitted range, pause briefly, and return with control.
- Hold for about 5 seconds, 10 repetitions per set, 3 sets per day.
From week 12: strength, control, and stability training
Before beginning strengthening, shoulder motion and muscle control should meet the required criteria, with no persistent pain or swelling after daily activity. Begin with light resistance and increase it gradually.
Multidirectional resistance-band exercises


Stand with one end of the band secured and hold the other end in the operated hand. Within the permitted range, practice flexion, extension, abduction, external rotation, or internal rotation. Choose light resistance that allows good movement quality throughout.
- 3 sessions per week, 2 to 3 sets per session, 8 to 12 repetitions per set.

Wall ball rolls
Place the palm lightly on a ball against the wall. Use the shoulder and periscapular muscles to control the ball as it rolls slowly on the wall. Keep the movement stable and pain-free.
- 3 sessions per week, 3 sets per session, 10 repetitions per set.
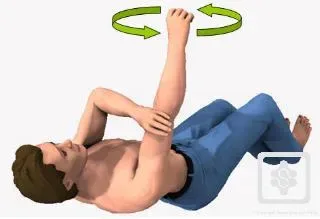
Supine circles
Lie on your back with the operated elbow slightly bent and the arm raised to the position permitted by your clinician. Make small clockwise and counterclockwise circles, increasing the size gradually while maintaining control.
- 3 sessions per week, 3 sets per session, 10 repetitions per set.


Supine shoulder punch and low row
For the supine punch, keep the elbow straight and lift the shoulder blade to reach the arm upward. For the low row, keep the trunk upright, draw the elbow back slowly, and gently retract the shoulder blade.
- 3 sessions per week, 3 sets per session, 10 repetitions per set.
- Do not shrug, twist the trunk, or use sudden force.
When should you stop exercising and seek review?
Recovery rates vary. At each follow-up, report pain, swelling, sleep, and response to daily activities and exercises. The care team can then adjust the exercise, frequency, or phase as needed.
Redness, drainage, an unpleasant odor from the wound, or fever.
Shoulder pain or swelling that is clearly worsening and does not settle with rest and icing.
A sudden pop, a sense that the joint has shifted, or sudden inability to raise the arm.
Persistent numbness, color change, marked swelling, or weakness in the arm or fingers.
Exercises can only be completed with marked shrugging, trunk leaning, or other compensation.
All content is for medical education only and cannot replace an in-person medical evaluation or an individualized treatment plan.
Further reading
Related articles
Shoulder rehabilitation
Rehabilitation After Shoulder Instability Surgery: Timeline and Illustrated Exercises
A staged guide to wound care, icing, brace use, pendulum exercises, shoulder blade control, range of motion and strengthening after surgery for shoulder instability.
Read articleShoulder rehabilitation
Rehabilitation After Shoulder Debridement, Capsular Release and Acromioplasty
Wound care, brace use, range-of-motion exercises and strengthening after shoulder debridement, capsular release and acromioplasty, with procedure-specific starting times and rehabilitation schedules.
Read articleShoulder rehabilitation
Rehabilitation after pectoralis major tendon repair: sling protection, shoulder exercises, and return to sport
Rehabilitation after pectoralis major tendon repair: wound care, icing, brace use, staged movement and strengthening exercises, and return to sport.
Read articleReferences
- Shoulder rehabilitation | Postoperative rehabilitation program after reverse total shoulder arthroplasty — Gongji Sports Medicine (Chinese)
- Massachusetts General Hospital — Rehabilitation Protocol for Reverse Shoulder Arthroplasty
- AAOS OrthoInfo — Reverse Total Shoulder Replacement
- Brigham and Women’s Hospital — Reverse Total Shoulder Arthroplasty Guideline
Patient Q&A
Frequently asked questions
What are the joint-preserving surgical options for massive irreparable rotator cuff tears?
For young patients with severe tendon retraction and fatty infiltration but without severe osteoarthritis, joint-preserving options include superior capsular reconstruction (SCR, using fascia lata or acellular dermal matrix to prevent humeral head migration), tendon transfer (such as lower trapezius or latissimus dorsi transfer to compensate for external rotation and arm elevation), and subacromial balloon placement (InSpace). For older patients with severe cuff tear arthropathy (CTA), reverse total shoulder arthroplasty (RSA) is more appropriate.
What sports are possible after shoulder replacement?
Most patients can do walking, cycling, light-to-moderate swimming, resistance-band training, and daily strength exercises. Heavy overhead lifting, sports with high fall risk, and intense contact sport should be avoided. Specific restrictions depend on the type of replacement, rotator cuff status, bone quality, and medical advice.
Could lateral shoulder weakness and numbness after overhead sports be quadrilateral space syndrome?
The quadrilateral space is formed by the teres major, teres minor, long head of the triceps, and humeral neck, through which the posterior branch of the axillary nerve and posterior circumflex humeral artery pass. Overhead throwing or trauma causing local fibrous band compression can lead to dull pain in the lateral/posterior shoulder, weakness, and atrophy of the deltoid posterior bundle and teres minor, with symptoms worsening when lying on the affected side at night. MRI or angiography can help identify teres minor denervation and vascular compression. Early physical therapy and local injections for decompression may be effective, with surgical release considered if conservative measures fail.
Contact
Contact us
Inquiry Received
Your message and attachments have been received.